Today I have some cups that will be used as favors for my grand-daughter's Frozen themed birthday party next month. I've seen a few people use these cups and found out you can buy them on line at www.webstaurantstore.com. They are 4 oz. each so they are the perfect size for favors.
I used the Cricut Explore to cut the snowflakes. It cut them perfectly, but it sure took a long time to cut all of them. It also took a long time to carefully get them off the cutting mat. I tore a couple in the process, but overall they came out good.
For the tags I used the Stampin' Up modern label punch. I inked the edges and stamped "thank you" from a stamp by Paper Smooches. The tiny snowflakes in the middle are stickers and the bling was Recollections brand from Michael's Crafts.
The cups are plain white when you get them. I cut snowflake paper from Michaels to cover the cups and added a solid blue cardstock band around the middle. Then I attached the labels and snowflakes. Inside will be a little candy surprise.
Showing posts with label Stampin' Up. Show all posts
Monday, November 17, 2014
Monday, November 11, 2013
Another Minnie mini Layout
Another layout for the Minnie Mouse album. I am loving these big polka dots. I used the Mickey Font cartridge again for the word Minnie, cut at 2.75 inches. The flowers were made using Stampin' Up punches.
I'm only a couple of pages in and I already love this album. As I'm making it I'm getting ideas for decorations and props for the party. More on that in another post.
Labels:
Layouts,
Mickey Font,
Stampin' Up
Monday, August 26, 2013
Baby Shower Decorations
Did you miss me? It's been a month since my last post. I've been busy with the baby shower decorations and didn't want the Mommy-to-be to see them before the shower, so I couldn't put them on my blog. We had the shower this past Saturday and everything turned out perfect so I have lots of pictures to share.
Centerpieces were umbrellas in clay pots that were spray painted lavender and then covered in baby diapers. Inside the pots were lots of Cricut cuts on sticks.
Close-up of the centerpieces.
I used decorative tape to cover the pvc pipe holding the umbrellas. I also used the same tape to wrap the water bottles. Then I hung Crystal Light on the outside for anyone that wanted to flavor their water.
Another favor we made for the guests were little bottles of hand and foot scrub. I attached a tag that says, "Thank you from baby and me" and then I hung a hand and foot that I made using Shrinky Dinks. The little butterfly on the Hershey Nuggets were made using a Stampin' Up punch.
This is a picture of the favor and treat table.
I will have more pictures tomorrow with the banners, tables and a few other goodies. Stay tuned.
Centerpieces were umbrellas in clay pots that were spray painted lavender and then covered in baby diapers. Inside the pots were lots of Cricut cuts on sticks.
Close-up of the centerpieces.
I used decorative tape to cover the pvc pipe holding the umbrellas. I also used the same tape to wrap the water bottles. Then I hung Crystal Light on the outside for anyone that wanted to flavor their water.
The favors were little boxes that held Hershey's Hugs and Kisses.
Another favor we made for the guests were little bottles of hand and foot scrub. I attached a tag that says, "Thank you from baby and me" and then I hung a hand and foot that I made using Shrinky Dinks. The little butterfly on the Hershey Nuggets were made using a Stampin' Up punch.
This is a picture of the favor and treat table.
I will have more pictures tomorrow with the banners, tables and a few other goodies. Stay tuned.
Labels:
Art Philosophy,
Baby Steps,
Feeling Groovy,
Shrinky Dinks,
Stampin' Up
Friday, July 5, 2013
All Smiles
Is there anything better than baby smiles and giggles? I think not. I only hope I can get some pictures of the baby smiling. Our first grand-daughter was always so serious when she was a baby. It was hard to get a picture of her smiling. Even when I thought I got one I would find out later, after getting the pictures printed, that I didn't get it.
Here's the layout.
I added the little butterfly from a Stampin' Up punch and added a sentiment to the middle of the banner.
Still more to come from this cartridge...
Here's the layout.
I added the little butterfly from a Stampin' Up punch and added a sentiment to the middle of the banner.
Still more to come from this cartridge...
Labels:
Layouts,
Stampin' Up,
The First Few Years
Tuesday, July 2, 2013
Announcing - The First Few Years
I have a layout posted over on the Cricut Fanatics Blog today. Please check out the full post over there.
I recently purchased the new Cricut cartridge The First Few Years and I am loving it. I started with the very first project and cut all the pieces exactly as the booklet suggested. Here is my finished layout.
Every piece on the layout was cut using The First Few Years cartridge except the butterflies which were made using a couple of punches by Stampin' Up.
I will have more layouts from this cartridge that I will be posting over the next few days. I hope you like lavender and gray. LOL.
I recently purchased the new Cricut cartridge The First Few Years and I am loving it. I started with the very first project and cut all the pieces exactly as the booklet suggested. Here is my finished layout.
Every piece on the layout was cut using The First Few Years cartridge except the butterflies which were made using a couple of punches by Stampin' Up.
I will have more layouts from this cartridge that I will be posting over the next few days. I hope you like lavender and gray. LOL.
Labels:
Layouts,
Stampin' Up,
The First Few Years
Monday, June 24, 2013
Anyone having a party?
Do you need labels for the food you'll be serving at your next party? How about these super cute banners? I'm still making teal and lavender versions of everything with gray chevron print thrown in. Any guesses on which banner will be used for the baby shower? Sometimes I think boy and sometimes I think girl, so basically I have no idea what the grand-baby will be.
Here's my first one with lavender, that says pulled pork. At my nieces graduation party a week ago one of the food items was a crock pot full of pulled pork. There were soft rolls and all the fixin's on the side. It was so good and such a great idea for a family party that I think we just might be having that for the baby shower.
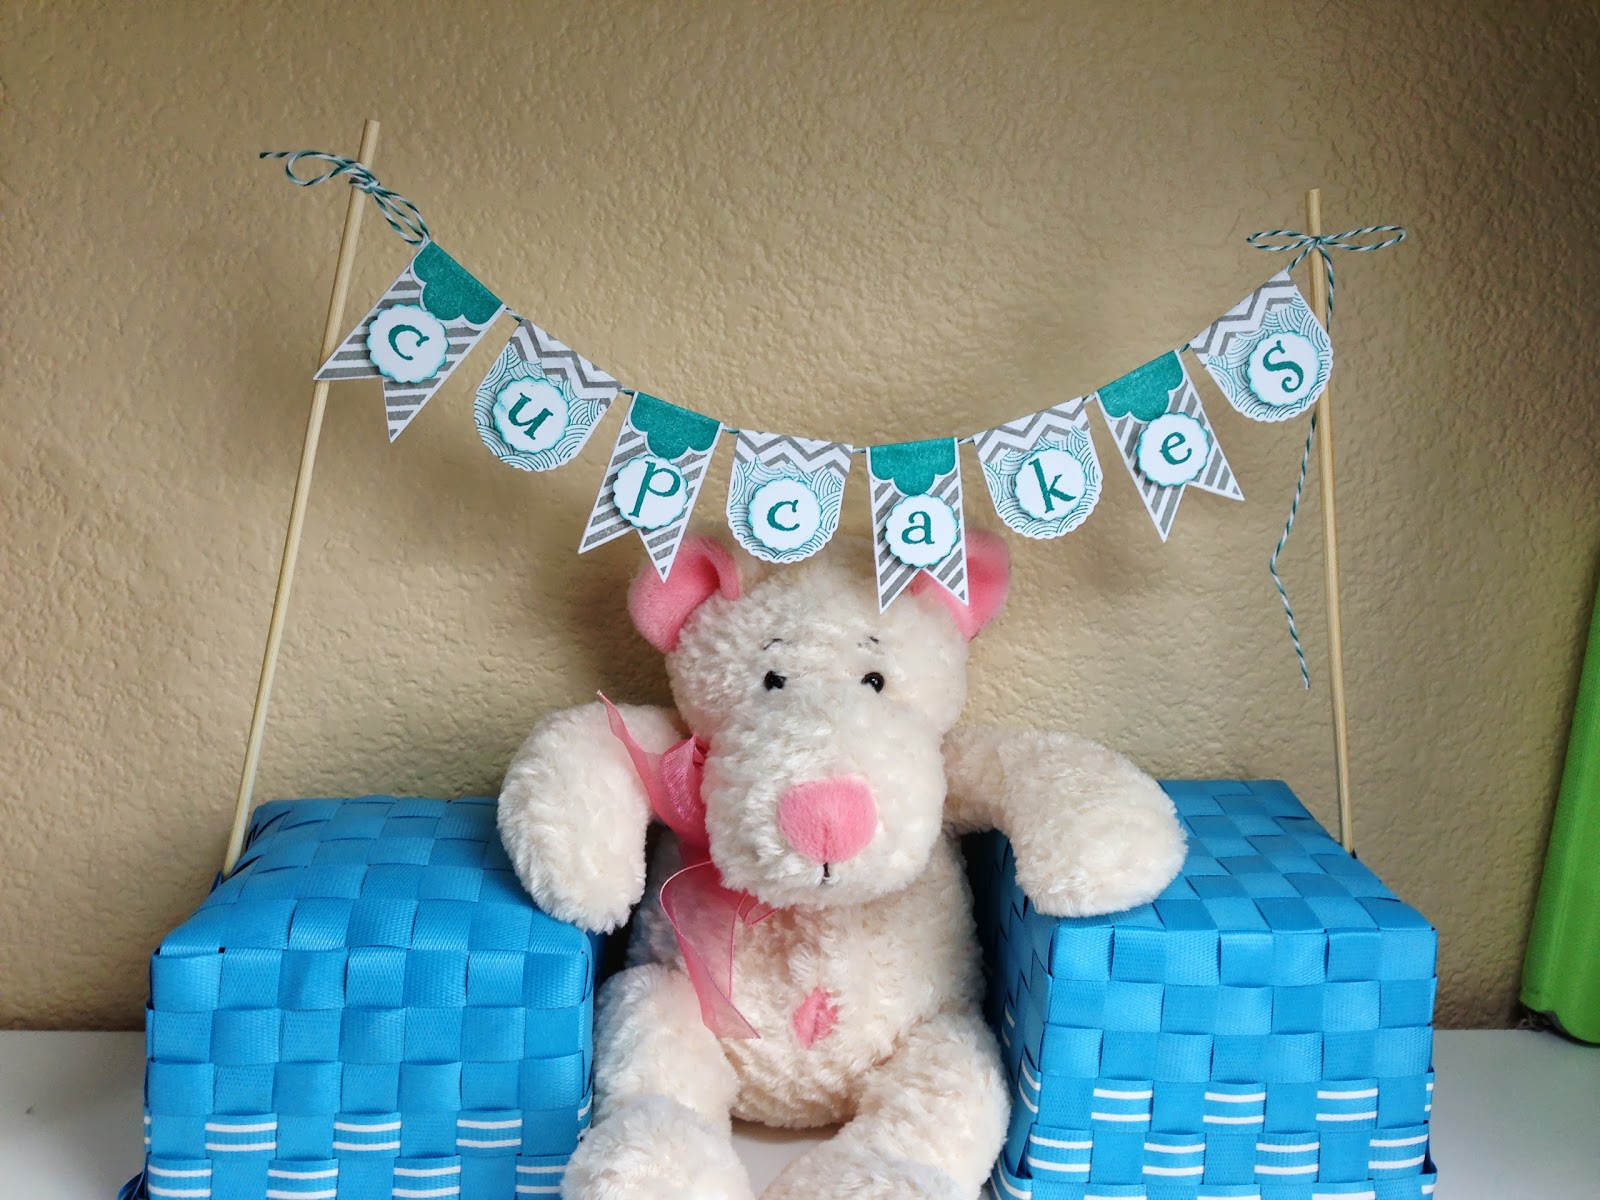
Here is the teal version that says cupcakes. What would a party be without cupcakes, right?
So time will tell which color gets used and we will all be happy either way. We find out this Friday, but our only concern is for a healthy baby (and then cupcakes!) LOL.
For the banners I used the Stampin' Up Hearts a Flutter stamps and framelits. For the letters I used the Close to my Heart Glamour alphabet. I also used a scallop circle punch from Stampin' Up. These banners were a lot of fun to make and I loved that I used so many of my small scraps.
Labels:
Banners,
Close to my Heart,
Stampin' Up
Friday, June 21, 2013
Lavender Baby Card
Yay! We made it to Friday! Today I have a lavender card to share. (Just in case the grand-baby is going to be a girl)
It is super cute in person. I scraplifted this card from one I saw on YouTube by Dawn5377. It's called a double peek a boo card and when you open it the images in the circles change. It's a really cute and fun card. The video by Dawn is here: http://www.youtube.com/watch?v=h6AghjVEhGA. I hope you enjoy it and maybe even give it a try. I used Stampin' Up punches for the circles and the scallop circles. The owl is from (I think) Stampin' Up. I'll have to double check that. And the sentiment is a Pink Stamper stamp.
Labels:
Cards,
MyPinkStamper,
Stampin' Up
Wednesday, June 19, 2013
Baby Card
It seems like I've been making more cards than layouts lately. I'm not gonna lie, it's fun! I love being able to get a finished project in so much less time. I also love using up my scraps. You can do so much more with so much less when making cards.
My son and daughter-in-law still have not announced the sex of their baby so I've been making crafts that are teal (if it's a boy) and lavender (if it's a girl). They will be hosting a gender reveal dinner on the 28th, so I don't have too much longer to wait, but boy it seems like forever!
The card today is a teal (boy) version. I'm helping a friend with putting on a baby shower at the end of August so I'm trying to come up with ideas for invitations, thank you notes, decorations and favors.
I used the pennants punch from Stampin' Up and everything went together very quickly. I also used the itty bitty punch pack from Stampin' Up and brads to hold the banner together on the front of the card.
My son and daughter-in-law still have not announced the sex of their baby so I've been making crafts that are teal (if it's a boy) and lavender (if it's a girl). They will be hosting a gender reveal dinner on the 28th, so I don't have too much longer to wait, but boy it seems like forever!
The card today is a teal (boy) version. I'm helping a friend with putting on a baby shower at the end of August so I'm trying to come up with ideas for invitations, thank you notes, decorations and favors.
The only definite thing I know is that there will be a gray chevron pattern that will be used regardless of the baby being a boy or a girl, so you'll be seeing a lot of that in the near future. The font stamp for the banners is from Close to my Heart and is called Glamour, Lower Case Alphabet.
Here is the inside:
I used the pennants punch from Stampin' Up and everything went together very quickly. I also used the itty bitty punch pack from Stampin' Up and brads to hold the banner together on the front of the card.
Labels:
Cards,
Close to my Heart,
Stampin' Up
Sunday, May 5, 2013
National Scrapbook Day Weekend - Project 1
One of my projects for today.... a Mother's Day Layout. Stay tuned for more projects through out the rest of today and tomorrow.
For the pennants, scallop circles, scallop border and labels I used Stampin' Up punches. I really love how easy it is to grab a punch and get the shape I want.
For Happy Mothers Day I used the Cricut cartridge Quarter Note. That is my favorite font for welding pretty letters together.
The challenge on the Cricut Circle messageboard was to pick three items in a row from a tic tac toe board. I chose to use a flower image, buttons and ribbon (instead of ribbon I used twine though). I also used my Gypsy to weld, bling and brads which were in some of the other boxes to choose from. So I guess I used a row going down in the first column and a row going horizontal on the bottom from the challenge.
For the pennants, scallop circles, scallop border and labels I used Stampin' Up punches. I really love how easy it is to grab a punch and get the shape I want.
For Happy Mothers Day I used the Cricut cartridge Quarter Note. That is my favorite font for welding pretty letters together.
The challenge on the Cricut Circle messageboard was to pick three items in a row from a tic tac toe board. I chose to use a flower image, buttons and ribbon (instead of ribbon I used twine though). I also used my Gypsy to weld, bling and brads which were in some of the other boxes to choose from. So I guess I used a row going down in the first column and a row going horizontal on the bottom from the challenge.
Labels:
Artiste,
Layouts,
Quarter Note,
Stampin' Up
Monday, April 29, 2013
Butterfly Triple Step Card
Today I have a card that I made with a new stamp I got from Stampin' Up. It's a swallowtail butterfly and it is just gorgeous.
The first card I made was black and white. I love the contrast. It's so striking. I even added a little butterfly to the inside of the card to finish it off.
After making the black one I wanted to try another color. I used Brilliant Blue from Stampin' Up for the cardstock and the ink.
The sentiment on the right lower side of the butterfly was stamped first and then covered up with a post it note so that the butterfly didn't stamp on that area. I then pulled off the post it note and voila! You could use any sentiment you want or no sentiment at all.
The way I created the layers was to cut the white cardstock at 5 1/4"x4", 4 1/4"x3" and 3 1/4"x2". The blue or black cardstock should be cut at 8 1/2"x5 1/2" (this piece will be folded in half to create the card base), 4 1/2"x3 1/4" and 3 1/2"x2 1/4".
Stack the white pieces on top of each other with a temporary adhesive.
After stacking the white pieces you will stamp your image.
The first card I made was black and white. I love the contrast. It's so striking. I even added a little butterfly to the inside of the card to finish it off.
After making the black one I wanted to try another color. I used Brilliant Blue from Stampin' Up for the cardstock and the ink.
The sentiment on the right lower side of the butterfly was stamped first and then covered up with a post it note so that the butterfly didn't stamp on that area. I then pulled off the post it note and voila! You could use any sentiment you want or no sentiment at all.
The way I created the layers was to cut the white cardstock at 5 1/4"x4", 4 1/4"x3" and 3 1/4"x2". The blue or black cardstock should be cut at 8 1/2"x5 1/2" (this piece will be folded in half to create the card base), 4 1/2"x3 1/4" and 3 1/2"x2 1/4".
Stack the white pieces on top of each other with a temporary adhesive.
After stacking the white pieces you will stamp your image.
After stamping you will then take the pieces apart and layer them on top of the colored cardstock.
I also used pop dots in between the layers to give them a little more dimension. That's it.
Wednesday, April 17, 2013
Thinking of You card
I'm still working on packing for the Cricut Circle Mania. I fly out to Georgia in the morning. I just know I'm forgetting something. I have a few different cards that I've created and cut pieces for so that I can assemble them at Mania. This is one of them.
I love the bright colors and the embossing. The flowers and stamping are from Stampin Up. The oval scallop is also from Stampin' Up. I'm not sure what the papers are because I found them in my scraps, but I think they are Stampin' Up.
The inside:
I love the bright colors and the embossing. The flowers and stamping are from Stampin Up. The oval scallop is also from Stampin' Up. I'm not sure what the papers are because I found them in my scraps, but I think they are Stampin' Up.
The inside:
Friday, April 12, 2013
Hello Hello Hello card
Happy Friday! I hope everyone has a little something crafty to do this weekend. I will be making more cards and preparing for my scrappy weekend Mania next week.
Today's card uses the Elegant Butterfly punch again from Stampin' Up and also uses the Bitty Butterfly punch. They work so well together.
Once again I used scraps for all the papers except the base card. I used a cuttlebug embossing folder, a few pearl accents, a sentiment stamp and voila, you have a card. Super super easy, just the way I like it. Before I embossed the white cardstock I punched the larger butterflies out of it. I then ran it through the cuttlebug and then adhered it to the blue piece of cardstock so that it would show through the punched areas. Then I simply added the smaller butterflies on top with stampin' dimensionals to give it a little pop.
The inside:
Today's card uses the Elegant Butterfly punch again from Stampin' Up and also uses the Bitty Butterfly punch. They work so well together.
Once again I used scraps for all the papers except the base card. I used a cuttlebug embossing folder, a few pearl accents, a sentiment stamp and voila, you have a card. Super super easy, just the way I like it. Before I embossed the white cardstock I punched the larger butterflies out of it. I then ran it through the cuttlebug and then adhered it to the blue piece of cardstock so that it would show through the punched areas. Then I simply added the smaller butterflies on top with stampin' dimensionals to give it a little pop.
The inside:
Labels:
Cards,
Cuttlebug,
Stampin' Up
Wednesday, April 10, 2013
Hello Sunshine card
Quick and simple card for you today. I ordered some Stampin' Up goodies a couple of weeks ago and fell in love with this butterfly punch. There is also a smaller butterfly punch that I'll show in another post.
The papers are all from my scrap pile except the base card itself. The scallop oval, the label punch and the border punch are all from Stampin' Up. The pearls are from my stash and the sentiment is a Peachy Keen stamp (I think) from a few years ago.
The inside:
The papers are all from my scrap pile except the base card itself. The scallop oval, the label punch and the border punch are all from Stampin' Up. The pearls are from my stash and the sentiment is a Peachy Keen stamp (I think) from a few years ago.
The inside:
Wednesday, July 4, 2012
Housewarming Utensil Pockets
Happy Fourth of July! I hope everyone is having a wonderful safe holiday. I'm spending the day in my craftroom and will hopefully see some fireworks later tonight.
My project today is another one for the housewarming party. Still going with the moving theme I decided to use newspaper print paper to make these because everyone uses newspaper to pack their fragile items, right?
This one is just a sample. When we make the ones for the party we will use better napkins and utensils. I cut the paper at 4" x 7" and used my ATG gun to glue it together as a pocket. I then used a couple of Stampin' Up punches to make the tag.
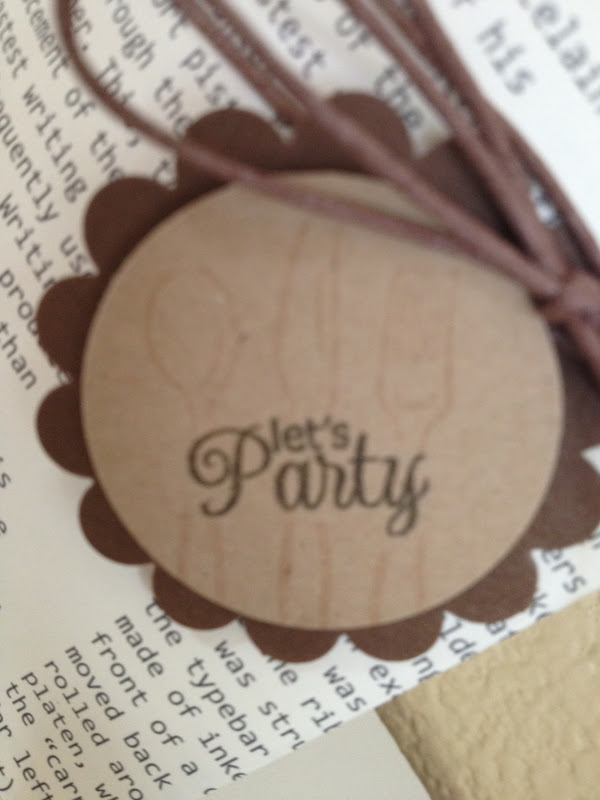
Its a little hard to see in this picture, but I stamped some utensils on the tag and Let's Party. The utensils are from the stamp set called Pair-a-Phrase by Close to my Heart. The sentiment Let's Party is from a set called Label Accents by Stamping Scrapping.
Have a wonderful Independence Day. Cindy
My project today is another one for the housewarming party. Still going with the moving theme I decided to use newspaper print paper to make these because everyone uses newspaper to pack their fragile items, right?
This one is just a sample. When we make the ones for the party we will use better napkins and utensils. I cut the paper at 4" x 7" and used my ATG gun to glue it together as a pocket. I then used a couple of Stampin' Up punches to make the tag.
Its a little hard to see in this picture, but I stamped some utensils on the tag and Let's Party. The utensils are from the stamp set called Pair-a-Phrase by Close to my Heart. The sentiment Let's Party is from a set called Label Accents by Stamping Scrapping.
Have a wonderful Independence Day. Cindy
Labels:
Close to my Heart,
Crafts,
Housewarming,
Stampin' Up
Saturday, June 30, 2012
Cupcake House Warming Party Favor
I have a special little box to share today. My son and daughter in law are in the process of buying a house right now and will hopefully be able to have a house-warming party in the next couple of months. I'm so excited for them and very proud of their accomplishments. I am so lucky to have such a wonderful daughter in law. We get along great and love to craft together.
I had this idea pop in my head for cupcake boxes that look like moving boxes. I used a piece of 12x12 craft paper cut in half. This way I'm able to make two boxes with one piece of paper. A little scoring and cutting and there you go.
The arrow is a clear stamp from the set called Adventure USA from Close to my Heart. The words are just written by me.
On this first example I cut out a scallop circle with a Stampin' Up punch to make a window to see the cupcake inside. Thank You was stamped using a clear stamp from the set called Say it in Style by Close to my Heart.
On my second example I used a cuttlebug embossing folder to make the craft paper looked corrugated like cardboard. I like the way it turned out. I also used a Spellbinders Nestability to cut the rectangular opening on this one. I then used that cut-out as the tag on top of the box.
I really like the way these boxes came out. Super easy to make, but super cute as well.
I had this idea pop in my head for cupcake boxes that look like moving boxes. I used a piece of 12x12 craft paper cut in half. This way I'm able to make two boxes with one piece of paper. A little scoring and cutting and there you go.
The arrow is a clear stamp from the set called Adventure USA from Close to my Heart. The words are just written by me.
On this first example I cut out a scallop circle with a Stampin' Up punch to make a window to see the cupcake inside. Thank You was stamped using a clear stamp from the set called Say it in Style by Close to my Heart.
On my second example I used a cuttlebug embossing folder to make the craft paper looked corrugated like cardboard. I like the way it turned out. I also used a Spellbinders Nestability to cut the rectangular opening on this one. I then used that cut-out as the tag on top of the box.
I really like the way these boxes came out. Super easy to make, but super cute as well.
Labels:
Close to my Heart,
Crafts,
Cuttlebug,
Spellbinders,
Stampin' Up
Monday, February 6, 2012
I copied and I LOVE IT!
I recently got the new Close To My Heart Idea Book/Catalog and I fell in love with the layouts and cards inside. I don't have any of their papers, but decided to try making the layout on the cover.
I went through all of my papers to find the ones that were as close as I could get.
All of these papers are from my stash. Some of them are from the scrapbook expo last November and some of them are a few years old.
I started out by cutting some butterflies from my Close to my Heart Art Philosophy cartridge at 1". I used plain vanilla cardstock.
After inking the edges I stamped them with a background stamp from Stampin' Up. I used two differnt colors of ink and then did a little more inking around the edges.
After the butterflies were done I cut a couple of vines at 2" and flowers at 2". The flowers were cut several times with different papers and then pieced together to give each flower different colored petals.
The scallop circle in the background was cut at 10". The word Love was cut at 1". The two tabs behind the photo mats were actually one piece that was cut in half. All of the cuts on this layout were cut from the Art Philosophy cartridge. I obviously can't take credit for the first half of the layout, but I love how both pages came together. Here is a closer look of the second page.
I went through all of my papers to find the ones that were as close as I could get.
All of these papers are from my stash. Some of them are from the scrapbook expo last November and some of them are a few years old.
I started out by cutting some butterflies from my Close to my Heart Art Philosophy cartridge at 1". I used plain vanilla cardstock.
After inking the edges I stamped them with a background stamp from Stampin' Up. I used two differnt colors of ink and then did a little more inking around the edges.
After the butterflies were done I cut a couple of vines at 2" and flowers at 2". The flowers were cut several times with different papers and then pieced together to give each flower different colored petals.
The scallop circle in the background was cut at 10". The word Love was cut at 1". The two tabs behind the photo mats were actually one piece that was cut in half. All of the cuts on this layout were cut from the Art Philosophy cartridge. I obviously can't take credit for the first half of the layout, but I love how both pages came together. Here is a closer look of the second page.
Labels:
Art Philosophy,
Layouts,
Stampin' Up
Subscribe to:
Posts (Atom)
Blessed are the children of scrapbookers, for they shall inherit the scrapbooks.